Are you ready to discover a dessert that combines gooey caramel, rich chocolate, and a buttery oat crust into one irresistible package? Look no further than Easy Salted Carmelitas! These delectable bars are a dream come true for beginner bakers and seasoned pros alike, offering a surprisingly simple path to a show-stopping treat. If you've been searching for a quick recipe that delivers maximum flavor with minimal fuss, your quest ends here. Get ready to bake a batch of these heavenly salted carmelitas that are perfect for sharing, snacking, or simply indulging your sweet tooth.
Why Salted Carmelitas Are Your Next Baking Obsession
There's a reason why salted carmelitas have earned their spot in the hearts of dessert lovers worldwide. This isn't just another cookie bar; it's a symphony of textures and tastes that's remarkably easy to achieve. For those just starting their baking journey, the simplicity of this recipe is a huge confidence booster. You don't need fancy techniques or obscure ingredients to create something truly impressive.
One of the primary draws of Salty-Sweet Perfection: Irresistible Salted Carmelita Bars is their straightforward preparation. The steps are intuitive, minimizing the chances of error and allowing you to focus on the joy of baking. Most of the ingredients are pantry staples, meaning you can often whip up a batch without a special trip to the grocery store. From mixing the oat crust to layering the decadent fillings, each stage is designed for ease and enjoyment. Plus, with a relatively short oven time, you'll be enjoying warm, gooey salted carmelitas in no time!
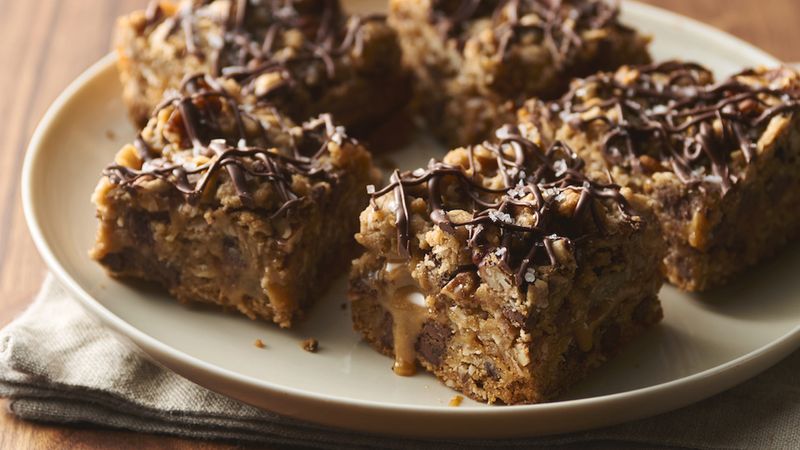
Beyond their ease, the flavor profile of salted carmelitas is what truly sets them apart. Imagine biting into a chewy, buttery oat base, followed by a molten layer of sweet caramel, punctuated by pockets of melted chocolate, all finished with a delicate sprinkle of flaky sea salt. It's that perfect dance between salty and sweet that creates an addictive experience, making these bars far more memorable than your average dessert. They offer a comforting, indulgent chewiness that satisfies every craving, making them ideal for everything from cozy evenings at home to festive gatherings.
The Magic Behind the Melt: Key Ingredients for Perfect Salted Carmelitas
Crafting the perfect batch of easy salted carmelitas starts with understanding the role each ingredient plays in creating that signature flavor and texture. While the recipe is simple, selecting quality components makes all the difference.
- The Hearty Oat Base: This forms the foundation of your carmelitas. You'll need good quality rolled oats (not instant or quick-cooking for the best texture), all-purpose flour, brown sugar (for its molasses notes and chewiness), and softened unsalted butter. A touch of baking soda ensures a tender crumb. The oats not only contribute a delightful chew but also add a wholesome touch, offering fiber that can support digestion and steady energy – a welcome bonus in an otherwise indulgent treat!
- The Gooey Caramel Layer: For beginner bakers seeking ultimate ease, store-bought soft caramels (like Kraft caramels) are your best friend. Simply unwrap them and melt them down with a splash of milk or cream to create a luscious, pourable sauce. Alternatively, more adventurous bakers can make a homemade caramel sauce for an even richer depth of flavor.
- The Decadent Chocolate Layer: What's a carmelita without chocolate? Semi-sweet chocolate chips are the classic choice, offering a balanced sweetness that complements the caramel without being overly rich. However, feel free to experiment with milk chocolate for a sweeter profile or dark chocolate chips for a more sophisticated, less sweet contrast.
- The Essential Flaky Sea Salt: This is the secret ingredient that elevates "caramelitas" to "salted carmelitas." A generous sprinkle of flaky sea salt (like Maldon or any good quality sea salt flakes) added after baking provides bursts of salinity that cut through the sweetness, enhancing all the other flavors. Don't skip this step – it's crucial for that irresistible salty-sweet balance!
Practical Tip: Ensure your butter is properly softened (but not melted) for the oat base. This allows it to cream smoothly with the sugar, creating a tender, uniform crust. For the caramel, melt it gently over low heat or in a microwave-safe bowl, stirring frequently to prevent scorching.
Step-by-Step Guide: Baking Your Easy Salted Carmelitas
Ready to get baking? Here's a simplified guide to creating your delightful salted carmelitas. Remember, precision in measurements and patience with cooling are key to success!
Preparation is Key
- Preheat and Prep: Begin by preheating your oven to the specified temperature (typically around 350°F / 175°C). Line a 9x13 inch baking pan with parchment paper, leaving an overhang on the sides. This "sling" will make it incredibly easy to lift the entire batch of bars out of the pan once cooled, allowing for neat, clean cuts.
Crafting the Oat Base
- Mix the Dry Ingredients: In a large mixing bowl, combine your all-purpose flour, rolled oats, brown sugar, baking soda, and a pinch of salt. Whisk briefly to ensure everything is evenly distributed.
- Add the Butter: Cut your softened unsalted butter into cubes and add it to the dry ingredients. Using a pastry blender, your fingers, or a stand mixer with a paddle attachment, cut the butter into the flour mixture until coarse crumbs form. The mixture should resemble wet sand.
- Press the First Layer: Press about two-thirds of this oat mixture evenly into the bottom of your prepared baking pan. Use the bottom of a flat glass or your hands to get a firm, even layer. This forms the delicious base of your salted carmelitas. Bake this crust for about 10-12 minutes until lightly golden.
Layering the Decadence
- Melt the Caramel: While the crust is pre-baking, prepare your caramel. If using store-bought caramels, unwrap them and place them in a microwave-safe bowl with a tablespoon or two of milk or cream. Microwave in 30-second intervals, stirring until smooth and pourable.
- Layer the Fillings: Once the base crust is lightly baked, remove it from the oven. Evenly sprinkle your chocolate chips over the warm crust. Then, carefully drizzle the melted caramel over the chocolate chips. A good tip for spreading caramel is to use the back of a spoon or a small offset spatula dipped in a little hot water, which prevents it from sticking.
The Top Crust & Finishing Touch
- Add the Top Crust: Crumble the remaining one-third of the oat mixture evenly over the caramel layer. Don't press it down too firmly; you want a rustic, crumbly topping.
- Bake to Perfection: Return the pan to the oven and bake for another 15-20 minutes, or until the topping is golden brown and the caramel is bubbly.
- Cool and Salt: This step is CRUCIAL for neat bars! Allow the salted carmelitas to cool completely in the pan on a wire rack before attempting to cut them. As they cool, the caramel will firm up, making for clean slices. While still warm (but not hot to the touch), or once fully cooled, generously sprinkle flaky sea salt over the top for that signature "salted" element.
- Slice and Enjoy: Once fully cooled and firm, use the parchment paper overhang to lift the entire slab out of the pan. Place it on a cutting board and slice into squares or bars of your desired size.
Customizing Your Carmelitas: Beyond the Basic Recipe
While the classic salted carmelitas recipe is undeniably perfect, one of its greatest strengths is its adaptability. You can easily tweak this recipe to suit different dietary needs or simply to explore new flavor combinations.
Dietary Adaptations
If you or your loved ones have specific dietary requirements, these bars can often be adjusted without sacrificing flavor or texture. For instance:
- Vegan Swaps: To make these bars vegan, swap the butter for a plant-based butter alternative, use a dairy-free chocolate (often readily available), and look for a vegan caramel sauce or make one using full-fat coconut milk and plant-based condensed milk. For a comprehensive guide on making these changes, check out our article on Salted Carmelitas: Chocolate, Caramel & Oat Bars for All Diets.
- Gluten-Free Options: For those with gluten sensitivities, ensure you use certified gluten-free rolled oats and substitute the all-purpose flour with a high-quality gluten-free all-purpose flour blend (one that includes xanthan gum for structure works best).
Flavor Twists
Once you've mastered the basic salted carmelitas, feel free to get creative! Here are a few ideas to inspire your next batch:
- Nutty Additions: Fold chopped pecans or walnuts into the oat crust mixture, or sprinkle them over the chocolate and caramel layers for an added crunch and nutty flavor.
- Different Chocolate Varieties: Beyond semi-sweet, try white chocolate chips for a sweeter, creamier profile, or butterscotch chips for a different kind of rich sweetness. A mix of different chips can also be delightful.
- Coffee Infusion: Add a teaspoon of instant espresso powder to the chocolate chips before sprinkling them. The coffee enhances the chocolate flavor without making the bars taste like coffee.
- A Hint of Spice: A pinch of cinnamon or nutmeg in the oat crust can add a warm, comforting note, especially during the colder months.
- Boozy Caramel: For adult palates, a splash of bourbon, rum, or Grand Marnier can be stirred into the melted caramel for an extra layer of sophisticated flavor.
Exploring these variations can lead to new favorites and make each batch of easy salted carmelitas a unique culinary adventure. They truly are an indulgence that caters to many preferences!
Easy Salted Carmelitas are much more than just a quick dessert; they're an invitation for beginner bakers to confidently step into the kitchen and create something truly spectacular. With their unbeatable combination of gooey caramel, rich chocolate, and hearty oats, all balanced by that crucial touch of sea salt, these bars are destined to become a staple in your recipe repertoire. Simple to prepare, incredibly satisfying to eat, and wonderfully versatile, these ultimate cookie bars prove that delicious indulgence doesn't have to be complicated. So, gather your ingredients, follow these straightforward steps, and get ready to enjoy the chewy, fudgy, salty-sweet perfection of your very own homemade salted carmelitas.
